Showing posts with label Linux. Show all posts

Reset the AdminServer Password in WebLogic 11g and 12c

If you forget the AdminServer password for your WebLogic 11g domain, you can reset it from the command line using the following process.
  • Set up the following environment variables. They are not necessary for the process itself, but will help you navigate. In this case my domain is called "ClassicDomain". Remember to change the value to match your domain.
    export MW_HOME=/u01/app/oracle/middleware
    export DOMAIN_HOME=$MW_HOME/user_projects/domains/ClassicDomain
  • Shut down the WebLogic domain.
    $ $DOMAIN_HOME/bin/stopWebLogic.sh
  • Rename the data folder.
    $ mv $DOMAIN_HOME/servers/AdminServer/data $DOMAIN_HOME/servers/AdminServer/data-old
  • Set the environment variables.
    $ . $DOMAIN_HOME/bin/setDomainEnv.sh
  • Reset the password using the following command. Remember to substitute the appropriate username and password.
    $ cd $DOMAIN_HOME/security
    $ java weblogic.security.utils.AdminAccount <username> <password> .
  • Update the "$DOMAIN_HOME/servers/AdminServer/security/boot.properties" file with the new username and password. The file format is shown below.
    username=<username>
    password=<password>
  • Start the WebLogic domain.
    $ $DOMAIN_HOME/bin/startWebLogic.sh
For more information see:

Powering on a virtual machine from the command line when the host cannot be managed using vSphere Client (1038043)

Purpose

This article provides steps to power on virtual machines from the command line (either through the ESX host console or through the RCLI/vSphere CLI) if the host cannot be managed from vCenter Server or from vSphere Client.

Resolution

Note: The steps in this article require root access to the host, either at the physical console or using SSH. For more information on enabling root access, see:

ESXi 5.x

To power on a virtual machine from the command line:
  1. List the inventory ID of the virtual machine with the command:

    vim-cmd vmsvc/getallvms |grep <vm name>
    Note: The first column of the output shows the vmid.

  2. Check the power state of the virtual machine with the command:

    vim-cmd vmsvc/power.getstate <vmid>
  3. Power-on the virtual machine with the command:

    vim-cmd vmsvc/power.on <vmid>

Sharing Files between RHEL 6 and Windows Systems with Samba

Samba and Samba Client
Samba allows both RHEL resources to be shared with Windows systems and Windows resources to be shared with RHEL systems. RHEL accesses Windows resources using a package named samba-client. RHEL resources, on the other hand, are shared with Windows systems using a package named samba. Typically, the samba-client is installed and configured by default allowing you to browse available Windows resources without any additional work (this is covered later in the chapter). In order to allow an RHEL 6 system to share resources with Windows systems, however, some more work is required.
Installing Samba on an RHEL 6 System
The default settings used during the RHEL 6 installation process do not install the samba package. Unless you specifically requested that Samba be installed it is unlikely that you have Samba installed on your system. To check whether Samba is installed, open a terminal window (Applications -> System Tools -> Terminal) and run the following rpm command:
rpm -q samba
If Samba is installed, the rpm command will generate output similar to the following:
samba-3.5.4-68.el6_0.1.x86_64
If Samba is not installed, rpm will return with "package samba is not installed". That being the case, it can be installed using the yum command-line tool:

Install Vsftpd to configure FTP server to transfer files.


 [1] Install Vsftpd 

[root@www ~]#  yum -y install vsftpd

[root@www ~]#  vi /etc/vsftpd/vsftpd.conf
# line 12: no anonymous
anonymous_enable=NO
# line 80,81: uncomment ( allow ascii mode )
ascii_upload_enable=YES
ascii_download_enable=YES
# line 95, 96: uncomment ( enable chroot )
chroot_local_user=YES
chroot_list_enable=YES
# line 98: uncomment ( specify chroot list )
chroot_list_file=/etc/vsftpd/chroot_list
# line 104: uncomment
ls_recurse_enable=YES
# add at the last line
# specify root directory ( if don't specify, users' home directory become FTP home directory)
local_root=public_html
# use localtime
use_localtime=YES
[root@www ~]# vi /etc/vsftpd/chroot_list
# add users you allow to move over their home directory
oracle
[root@www ~]# /etc/rc.d/init.d/vsftpd start

Starting vsftpd for vsftpd: [  OK  ]
[root@www ~]#
chkconfig vsftpd on 

Disable SELinux on Server
[root@www ~]# setenforce 0

How do I disable a firewall in RedHat Enterprise Linux / RHEL?


A. A Linux firewall is an integrated collection of security measures designed to prevent unauthorized electronic access to a networked computer system. Red hat Linux kernel has firewall called iptables.

It can be disabled by typing following command (login as root user):

# service iptables stop

To turn it on type the following command:

# service iptables start

To disable firewall permanently, enter:

# chkconfig iptables off
# service iptables stop

Oracle Linux 6 Installation


This article provides a pictorial guide for performing a default installation of Oracle Linux 6.
  • Basic Installation
  • Firewall
  • SELinux
Basic Installation
  1. Boot from the DVD. At the boot screen, press the "Enter" key.


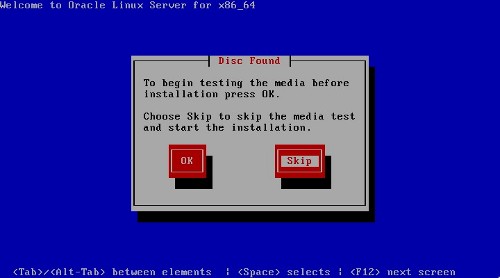
  1. Press the "tab" key to move focus to the "Skip" key, then press the "Enter" key to continue.

How to Configure a Yum Repository Server in RHEL 5


1) Install vsftpd (FTP Server) & createrepo Packages

Insert RHEL 5 Installation DVD

# mkdir ~/Desktop/rhel_cd
# mount /dev/cdrom ~/Desktop/rhel_cd
# cd ~/Desktop/rhel_cd/Server
# rpm –ivh vsftpd*
# rpm –ivh createrepo*

2) Copy all packages from DVD to LINUX filesystem
# cp ~/Desktop/rhel_cd/Server/ /var/ftp/pub
# cd /
# eject

3) Configure Local Yum Repository Server
# cd /var/ftp/pub/Server/repodata
# cp comps-rhel5-server-core.xml /var/ftp/pub/Server/
# cd /var/ftp/pub/Server
# createrepo -vg comps-rhel5-server-core.xml /var/ftp/pub/Server/
# service vsftpd start
# chkconfig --add vsftpd